
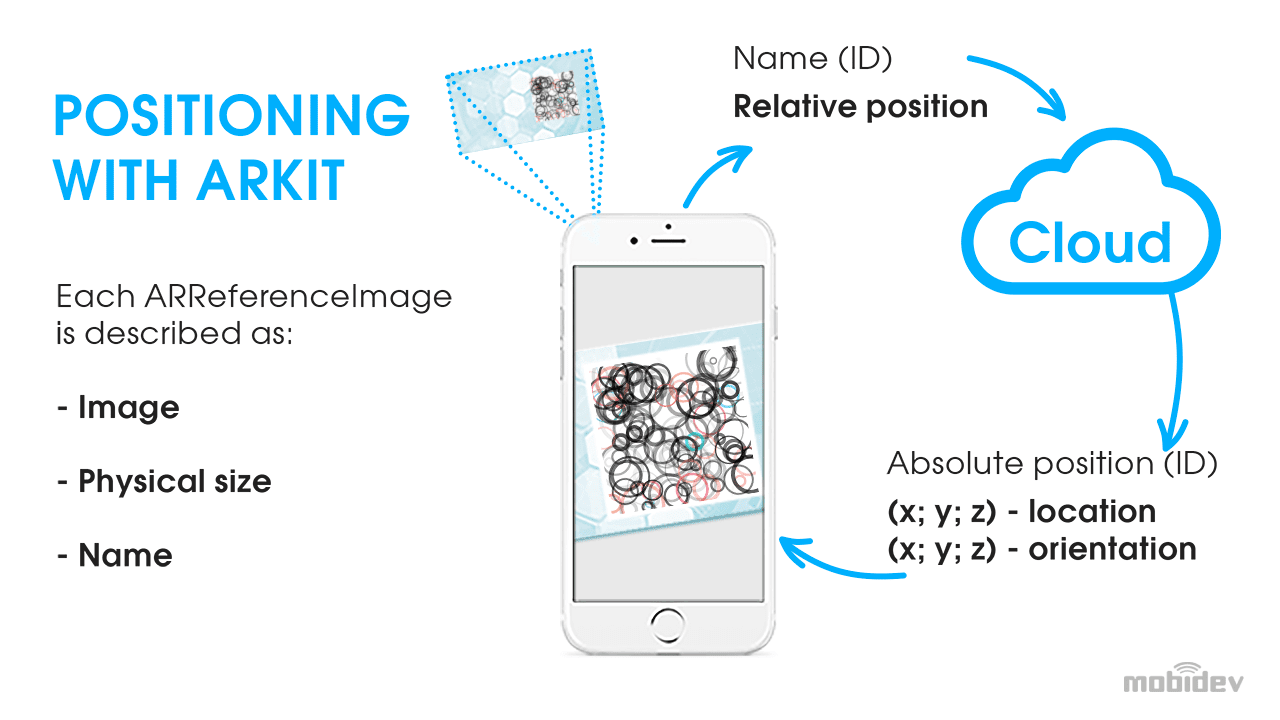
Ever since I first tried out an AR app on my iPhone, I’ve been hooked on that blend of real and digital worlds—it’s like having a superpower in your pocket. Picture this: you’re sitting on your couch, and with a quick scan, virtual furniture pops up to redesign your room. That’s the everyday magic ARKit brings to iOS, and today, we’re diving deep into it all in a laid-back way, no tech jargon overload. If you’re an iOS dev curious about augmented reality, stick around; we’ll cover the essentials without making it feel like a chore.
So, what’s the core of ARKit? It’s Apple’s powerhouse framework that lets you slap digital stuff onto the real world using your device’s camera and sensors. ARKit in iOS essentially bridges the gap between physical and virtual, making it a breeze to create immersive experiences. If you’re asking how to get started with AR on iOS, think of it as your go-to toolkit for apps that overlay 3D objects, detect surfaces, and even track faces—all while keeping things smooth and intuitive.
Why ARKit Feels Like a Game-Changer for iOS Devs
Let’s keep it real: ARKit isn’t just another API; it’s like the secret sauce that turned my basic coding projects into wow-factor demos. Launched with iOS 11, it revolutionized how we interact with apps by using the iPhone’s hardware smarts. We’re talking about features like world tracking, which keeps virtual objects anchored in place as you move around. It’s perfect for everything from educational tools to fun filters on social media. And here’s a fun fact—it’s inspired by those viral Pokémon GO moments, but way more polished for professional use.
As an iOS tutorial enthusiast, I remember tinkering with ARKit during a rainy weekend, turning my kitchen into a virtual art gallery. The framework handles the heavy lifting, like estimating lighting and detecting planes, so you can focus on the creative bits. If you’re new to this, augmented reality on iOS starts with understanding its core components: ARSession for managing the camera feed, ARAnchor for pinning objects, and ARPlaneDetection for spotting floors and tables. It’s all about making your app feel natural and responsive.
Practical advice for iOS gamingSetting Up Your iOS Environment for AR Adventures
Alright, let’s roll up our sleeves and get practical. Before you start building, you need the right setup—think of it as prepping your tools for a DIY project. First off, ensure you’re rocking Xcode 12 or later, since that’s where the magic happens. Download it from the Apple Developer site if you haven’t already; it’s free and packs everything you need for ARKit development.
Now, for the fun part: creating a new project. Open Xcode, select “Augmented Reality App” from the templates, and voilà—it’s set up with SceneKit or RealityKit integration. Here’s a quick step-by-step to get you going, keeping it super relaxed:
1Open your new project and head to the ViewController. This is where you’ll initialize the AR session.
2Import ARKit and set up your ARView. Add code like let arView = ARView(frame: .zero) to get the camera feed running.
Advanced settings in iOS control center3Configure the session with ARWorldTrackingConfiguration() for basic tracking, then run it with arView.session.run(configuration).
Once that’s done, test on a real device—simulators won’t cut it for AR. I once spent an hour debugging on a sim only to realize it needed actual hardware; lesson learned! This setup lets you dive into iOS AR tutorials without the initial headaches.
Building and Enhancing Your First ARKit App
Okay, now that you’re set up, let’s build something simple yet cool, like placing a 3D model on a table. ARKit makes this straightforward with its node-based system in SceneKit. Imagine you’re a kid with building blocks; each node is a piece you position in the AR world.
For instance, to add a virtual chair, you’d use an ARAnchor to detect a horizontal surface and then attach a SCNNode. Here’s where the creativity shines—mix in gestures for interaction, like pinching to scale objects. In my experiments, I added sound effects for when things “land” on surfaces, making it feel more alive. If you’re aiming for advanced stuff, explore ARKit’s face tracking for apps like virtual try-on filters, or even body tracking in newer iOS versions.
Beginner’s steps for iPhone setupTo keep things varied, let’s throw in a quick comparison table of ARKit versions, because not all are created equal:
| Version | Key Features | Best For |
|---|---|---|
| ARKit 1 (iOS 11) | Basic plane detection, world tracking | Beginner projects and simple overlays |
| ARKit 3 (iOS 13) | Improved lighting, people occlusion | More realistic interactions and social apps |
| ARKit 6 (iOS 15+) | Advanced mesh generation, location anchors | Complex experiences like virtual tours |
This table shows how ARKit has evolved, helping you pick the right tools for your iOS AR journey.
Pro Tips and Common Pitfalls to Avoid
From my own late-night coding sessions, I’ve picked up a few gems. Always handle device compatibility—ARKit needs an A12 chip or later for the best performance. And don’t forget to optimize for battery life; AR can drain it fast, so use efficient rendering techniques.
One quirky thing I love is integrating with other iOS frameworks, like Core ML for object recognition in AR. It’s like giving your app eyes and brains. But watch out for overcomplicating—start small, test often, and remember, the goal is to wow users, not overwhelm them.
Pro methods for iOS file managementWrapping Up with a Fresh Perspective
As we ease out of this guide, think about how ARKit could turn your everyday iOS apps into something extraordinary—maybe an app that helps visualize home renovations or teaches kids science interactively. What’s stopping you from experimenting next? Dive in, play around, and who knows, you might just create the next big AR hit on the App Store.
FAQ
Is ARKit only for professional developers? Not at all—it’s accessible for hobbyists too, with plenty of online resources to get started, even if you’re just learning Swift.
What devices support ARKit? You’ll need an iPhone or iPad with A9 chip or later, like iPhone 6s and up, for full features.
Can I monetize ARKit apps? Absolutely, as long as you follow Apple’s guidelines, turning your creations into profitable iOS experiences.